How to Customize your Zsh Terminal
VMware’s Cloud Service Livefire Team has started delivering their class using an Ubuntu Desktop via Horizon 7. The console of the desktop has been customized to optimize the attendee experience for the various Kubernetes related labs they will work through. I thought it would be a good idea to provide guidance for creating a similar console experience for MacOS users since Catalina has started using ZSH as its default shell. In this article, we will be working through a variety of installations and configurations needed to create a more functional, and visually compelling terminal as seen above using iTerm2, Oh My Zsh, and PowerLevel10k.
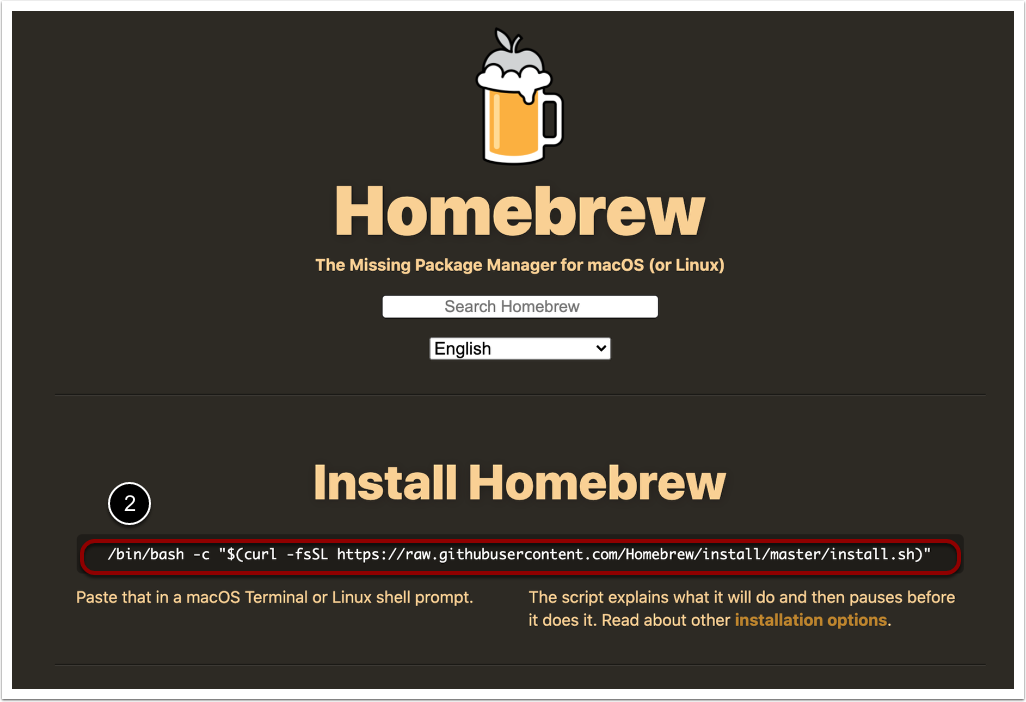
Install Homebrew
To begin, we will be installing the package manager Homebrew, which is predominantly used on MacOS (or Linux).
- Navigate to the site https://brew.sh/
- Copy the code snippet provided on the page, and paste that into your preferred terminal and press Return. In this instance, we will be using the native Terminal application that is installed on MacOS. Enter your password when prompted.
Once installed, type the command brew --version to verify that Homebrew has been successfully installed.

Install Relevant Fonts and iTerm2
Now with Homebrew installed, we will be using the package manager to install custom fonts as well as iTerm2, which will be used as a replacement for the default terminal installed. iTerm2 offers a variety of features including split panes, autocomplete, and shell integration, among many more features. The custom font we will be using for iTerm2 is the hack-nerd-font.
- In your terminal, enter the command:
brew tap homebrew/cask-fonts.

- In your terminal, enter the command:
brew cask install font-hack-nerd-font iterm2.

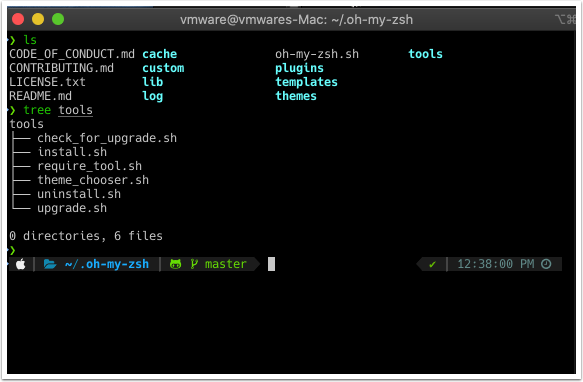
Install More Terminal Tools
In this section, we will be installing a few terminal tools to help enhance your terminal experience:
- FZF: Helps you search lists and open files quickly in your terminal using the “fzf” command
- Tree: Lists out directories in a tree format recursively
- SSHFS (Secure Shell FileSystem): Allows for remote filesystems to be accessed securely over SSH
- JQ: A command-line JSON processor similar to sed/grep
- zsh-syntax-highlighting: Adds syntax highlighting for zsh
- In your terminal, enter the command:
brew cask install osxfuseand enter your password if prompted. This is needed in order to install sshfs.

- In your terminal, enter the command:
brew install fzf tree sshfs jq zsh-syntax-highlightingto install all of the commands.

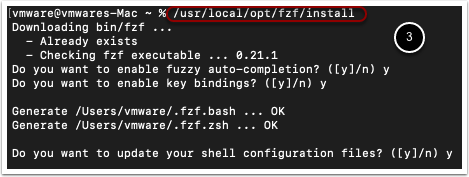
- In order to enable fuzzy auto-completion and enable keybindings, run the following command:
/usr/local/opt/fzf/installand press Y when prompted.
- In order to have fzf capabilities in Vim, add the following line to your .vimrc file using the command:
echo -n "set rtp+=/usr/local/opt/fzf" >> .vimrc. This will append the line into an existing .vimrc file located in your current directory, or will create one if there is not one present. Run cat .vimrc to verify ZSH that it was successfully added to the file.

Installing Oh My Zsh
Oh My Zsh is a community-driven framework that manages your Zsh configuration, and has a wide selection of functions, plugins and themes to enhance your terminal’s functionality and appearance.
- In order to install Oh My Zsh, run the following command:
sh -c "$(curl -fsSL https://raw.githubusercontent.com/ohmyzsh/ohmyzsh/master/tools/install.sh)". Take note of the insecure completion-dependent directories, and hit Control+D to return to your shell.
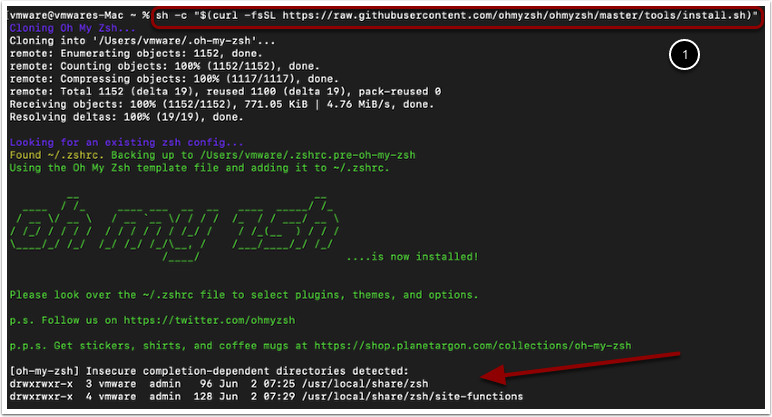
- To address these insecure completion-dependent directories, modify the permissions w/ the two following commands:
chmod 700 /usr/local/share/zshandchmod 700 /usr/local/share/zsh/site-functions.
Installing Powerlevel10k
Powerlevel10k is a Zsh theme with a builtin configuration wizard to help customize your terminal.
- To install PowerLevel10k, run the following command:
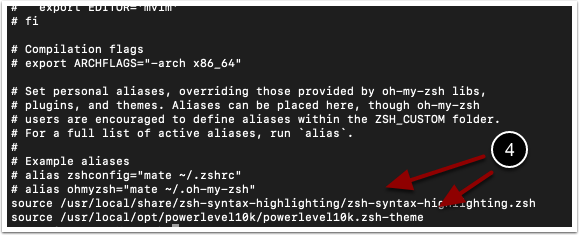
brew install romkatv/powerlevel10k/powerlevel10k. - In order to activate powerlevel10k, run the following command to add the necessary line to the .zshrc file (make sure it is in the directory you are currently in):
echo 'source /usr/local/opt/powerlevel10k/powerlevel10k.zsh-theme' >>! ~/.zshrc. - In order to enable the zsh syntax highlighting that was previously installed, run the following command to add it to the .zshrc file:
echo 'source /usr/local/share/zsh-syntax-highlighting/zsh-syntax-highlighting.zsh' >>! ~/.zshrc. - Verify that Step 2 and Step 3 worked by checking the .zshrc file:
cat ~/.zshrc.
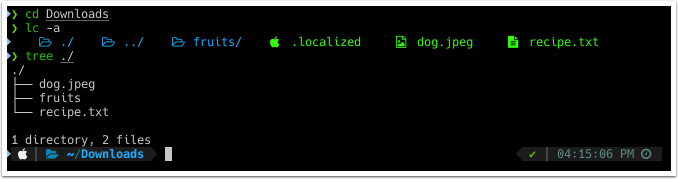
Add ColorLS to zShell
ColorLS is a tool that can be used as a replacement of “ls” to have color and icons. In this case, we will be setting the alias to lc such that you can run lc to get the colorized version of it.
- First, install ColorLS with the following command:
sudo gem install colorlsand enter your password when prompted. - For Zsh to use ColorLS, add it to your .zshrc file with the following command:
echo "alias lc='colorls --sd'" >> ~/.zshrc.

Shell Integration with iTerm2
Shell integration allows for the tracking of command history, current working directory, and more over ssh.
- To add shell integration to iTerm2, run the following command:
curl -L "https://iterm2.com/shell_integration/install_shell_integration_and_utilities.sh" | bash.

Dynamic Profile with iTerm2
Dynamic Profiles is a feature of iTerm2 that will allow you to specify a profile outside of the default macOS preferences.
- Create the directory for the dynamic profile with the following command:
mkdir -p ~/Library/ApplicationSupport/iTerm2/DynamicProfiles. - Next, run the following command to add the dynamic profile configuration into the override.json file that will be located in the recently created DynamicProfiles folder:
cat > ~/Library/ApplicationSupport/iTerm2/DynamicProfiles/override.json << "EOF". Once that is entered, enter the following details to set the name, guid, non ascii font, and normal font. In this case, we will be using MeslosLGS-NF-Regular 13:
{
 "Profiles": [
 {
 "Name": "Override",
 "Guid": "A7AB362C-4D81-44BA-B615-6759D0212691",
 "Non Ascii Font" : "MesloLGS-NF-Regular 13",
 "Normal Font" : "MesloLGS-NF-Regular 13"
 }
 ]
}
EOF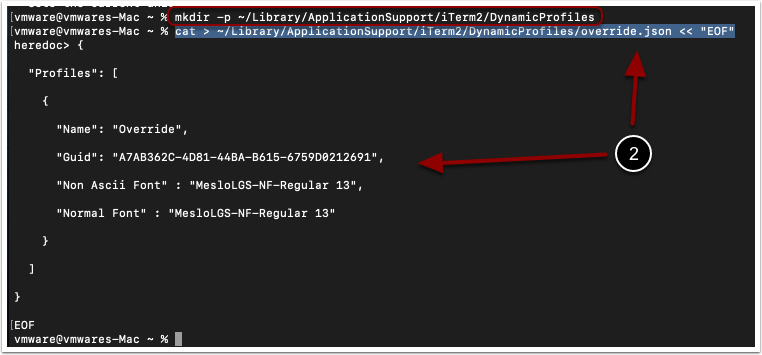
Customizing iTerm2
In this section, we will be changing the preferences of iTerm2 and working through the Powerlevel10k configuration wizard to complete the customization of your new terminal.
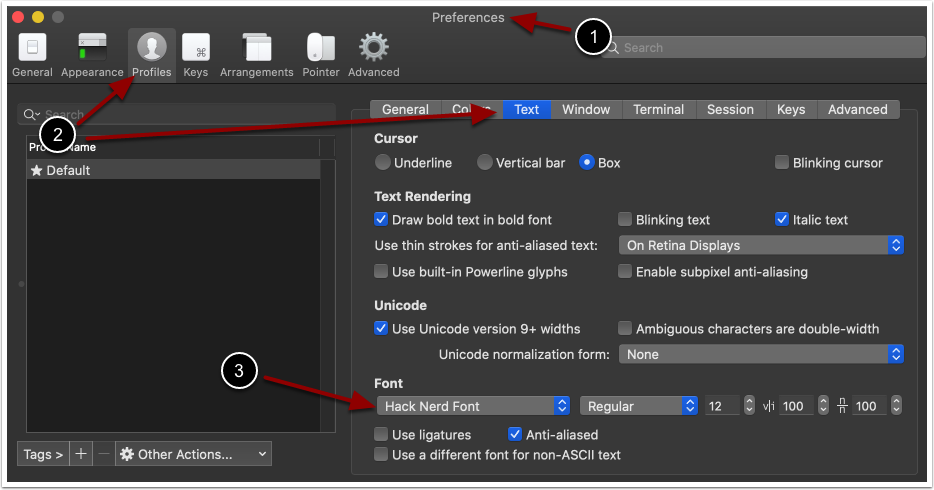
- Open up iTerm2 and go to Preference.
- Go to the Profiles tab, and select the Text tab.
- From here, click the font option to the Hack Nerd Font.
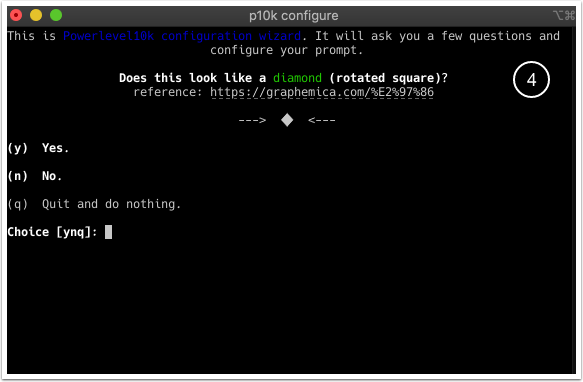
- Return to the iTerm2 terminal, and run the command:
p10k configure. Install any needed fonts, and continue with the prompt shown below. A sample terminal from one of the configurations is shown below.
Depending on the choices you make throughout the setup completed above, your terminal can result in looking like the following: